
- 100% whole wheat pancake mix
- Pumpkin Spice pancake mix
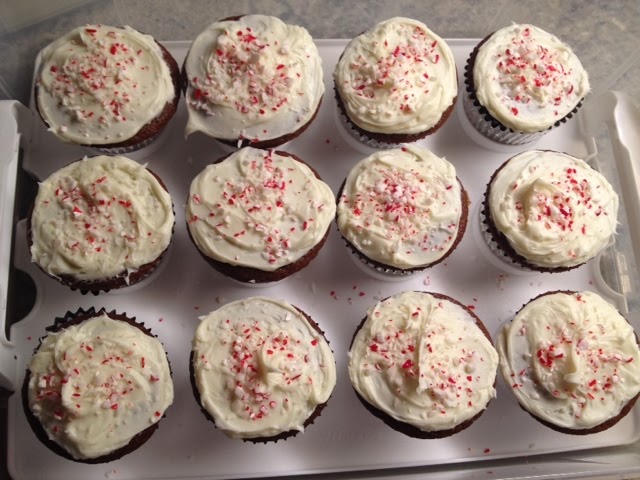
- Gingerbread cupcakes with vanilla frosting topped with peppermint chips.

O.K. Let's get moving. Let's start with the pancake mixes.
In a nutshell, these are very simple. It's all the dry ingredients of my recipes mixed together and divided into clean mason jars. You really could make a fancy holiday mix out of just about anything. Don't like the idea of pancake mixes? Choose something that you like or that someone else would like. I'm considering the idea of a brownie mix, hot cocoa mix, savory bread mix...The options are endless.
Here is the recipe for the pumpkin spice pancakes. They are known also as whole wheat pumpkin pancakes. It's the same recipe but the idea of pumpkin spice and putting that label on a jar is more appealing. This recipe makes about 12 pancakes and will fill 1 16 oz. pint jar. Since I filled 6 jars with pancake mix I had to multiply the recipe by 6. You will need a huge bowl or container. I used the plastic containers I usually use for making bread. It should hold at least 1 1/2 quarts.
Here is the recipe for the 100% Whole Wheat Pancakes that don't feel like a brick in your tummy.
A brief note on whole wheat flours.
I prefer to use stone ground whole wheat whenever possible. The problem however can be one of texture. Whole wheat is heavy and absorbs more liquid that all-purpose flour. You cannot just substitute whole wheat flour for all-purpose. Enter whole wheat pastry flour. Whole wheat pastry flour has the same health benefits as regular whole wheat flour but is lighter and doesn't create that heavy brick-like feeling in your tum. White whole wheat flour can also be used in place of whole wheat pastry flour but may be more difficult to find and I feel is a bit lacking in flavor.
Getting back on topic. Here's the recipe.
100% Whole Wheat Pancakes
Dry Ingredients:
- 1 cup whole wheat pastry flour
- 3/4 cup whole wheat flour
- 2 tsp. baking powder
- 1/2 tsp. baking soda
- 1/4 tsp. kosher salt
- 2 tbsp. pure cane sugar
- 1 egg
- 1 1/2 cups milk of choice (I prefer buttermilk or plain kefir)
- 3 tsp. oil of choice (I prefer coconut oil)
Then you just cook the pancakes as you normally would. For those who have never made pancakes here some basic directions.
- Heat up oil in a pan on medium heat.
- Pour or spoon a small amount of batter into the pan.
- When the sides of your pancake appear dry and the center of the batter is bubbly, flip.
- Cook the other side, plate and eat that sucka!

**To make the pancake mixes follow these directions.
1. Wash all lids, rings, and jars in warm soapy water and let them dry completely.

2. Multiply the dry ingredients by 6 for 6 pint jars.

3. Whisk all the dry ingredients completely and fill up each jar to the rim. Recipients will have to add their own wet ingredients.
4. Make labels for the tops of your jars. I went to this site and downloaded the red regular wide mouth lids onto sticker paper that I got from my local Stampadoodle http://www.stampadoodle.com/. This is a fantastic local craft store. Cut out the circle stickers and put onto the lids. Then write down what is inside the jar, i.e. pancake mix, or pumpkin spice mix.

5. Stampadoodle also has complimentary dye cut patterns. As long as you buy your paper there you can use their huge supply of crafting dye cuts. For those of you who don't know, dye cuts are automatic cutters that will cut a specific shape over and over. They are expensive to buy your own so I opted (with help) to use a label cut out.

I also went to avery.com and downloaded an appropriate template onto my computer. I used the dye cuts (red label patterns) to choose a template that would fit. Then I typed in my directions for using the mix (what wet ingredients to add).

6. Print the directions out onto the sticker paper, cut to fit the dye cut label and stick it on there.

Don't you like my antique paper cutter? It's my mom's and it has a story. I will share it if pressed. You need to ask though. Preferably in the comments section. :-)

I used some green hemp string to affix the labels to each jar.

Here's a so-so picture of the final product. Remember people buy Bisquick to save themselves the time of mixing dry ingredients. These mixes are fun, cheerful, healthy, and save your friends/family the inconvenience of making them from scratch. We all need some extra time savers during the holidays right?
Now if you still have energy to spare. Here is the recipe for the Gingerbread Cupcakes I made. They are super amazing and at the bazaar they sold out in about 1 hour! If I new they were going to be that successful I would have made more.
Before I begin I want to tell you that while I make fantastic gingerbread, I struggle with frosting. I haven't mastered it yet and I resorted to using a canned frosting. Sorry, but it's the only one I know that doesn't have dairy in it and I haven't found a lactose-free frosting recipe that I like yet. If you have suggestions/ideas for a good one. Post it here please!!!
Gingerbread Cupcakes with Vanilla Frosting and Peppermint Chips:
Dry Ingredients:
- 3 cups all-purpose flour (whole wheat pastry flour will work too)
- 1/4 tsp. nutmeg
- 1 tsp. cinnamon
- 1 tsp. kosher salt
- 1/2 tsp. ground cloves
- 2 tsp. ginger powder
- 1 tsp. baking powder
- 1 tsp. baking soda
- 3 large eggs
- 1 cup cane sugar
- 1 cup oil of choice
- 1 cup blackstrap molasses
- 1 cup (or 1/2 pint) buttermilk (plain kefir will also work but I prefer buttermilk)
In a separate bowl whisk the eggs and add the sugar. Beat until smooth. Add the oil, molasses and buttermilk and mix thoroughly. Gradually add the dry ingredients and whish until smooth.
Pour batter into cupcake wrappers (I used Reynolds silver ones for their festive appeal) about 2/3 full. Bake in a 325 degree oven for 30-40 minutes. Bake until a toothpick inserted comes out clean.
Remove the cupcakes from the cupcake tins and cool on a wire rack. When completely cool frost with Pillsbury Whipped Vanilla Frosting. Top with peppermint chips. If you can't find any in the store, just crush up some candy canes in a plastic Ziploc bag. Boom! Instant peppermint chips. Here are the ones I used. http://kencraftcandy.com/All-Products/Seasonal/Christmas/All-Natural-Peppermint-Chips
That's it!
Actually it was a lot of work and took all day. But really it was for a good cause and I have about 1 or 2 times a year that I get all crafty. That stuff takes forever! I am going to make the gingerbread cupcakes again though. They were insanely good and I'm not a sweets person. That is saying a lot!
If you have questions feel free to post them here. I get back very quickly.
Happy Holidays to you all.
No comments:
Post a Comment